Showing posts with label furniture. Show all posts

Saturday, December 27, 2014

Top 10 Ivy & Co. Posts for 2014

2014 has been good to Ivy & Co. Real good.

Here are a few highlights: 
-Ivy & Co. became an actual business, a.k.a. I pay taxes on it. Woohoo!
-I successfully sold my products at the Seabury Hall Craft Fair, my first big event as a business.
-We moved to Kauai!
-I was asked by ROSS Dress for Less to review their new store on Kauai!
-We hit 1,000 followers on Instagram and Facebook!
-A lady named "Nancy Nette" stole my domain name, www.ivy-and-co.com, and tried to sell it back to me for $800. That was fun, and thus the reason why we can now be found at www.THEivyandco.com
-And perhaps my biggest goal, which I set at the start of the year-- Ivy & Co. is now in 6 different retail shops on Maui, Kauai and Portland! 

With all that said, there are still 10 other posts that had more page views than any other this year! 

Ivy and co, the ivy and co, top blog posts, top 10, 2014 round up, favorite articles, furniture, how to get your product into retail stores, kids memory verses

Let's break it down.

Ivy and co, the ivy and co, top blog posts, top 10, 2014 round up, favorite articles, furniture, how to get your product into retail stores, kids memory verses
#1 - After visiting family in Oklahoma and Arkansas last Thanksgiving, I brought home a few old train cases, and added them to my collection. The #1 post of 2014: How To Recover A Vintage Train Case

Ivy and co, the ivy and co, top blog posts, top 10, 2014 round up, favorite articles, furniture, how to get your product into retail stores, kids memory verses
#2 - My cousin had this Mid Century Modern side table sitting in her carport for a while. She gave it to me and it turned out to be a pretty neat makeover. It sold within 6 hours of me posting it on Instagram!

Ivy and co, the ivy and co, top blog posts, top 10, 2014 round up, favorite articles, furniture, how to get your product into retail stores, kids memory verses
#3 - So we were looking at houses to buy on Maui, and I came across this Antique Dresser in one of them. Kit went back later and bought the dresser for me, not the house. I was perfectly fine with that!

Ivy and co, the ivy and co, top blog posts, top 10, 2014 round up, favorite articles, furniture, how to get your product into retail stores, kids memory verses
#4 - This family heirloom got a makeover, and it resembles my favorite movie, The Wizard Of Oz. 

Ivy and co, the ivy and co, top blog posts, top 10, 2014 round up, favorite articles, furniture, how to get your product into retail stores, kids memory verses
#5 - People loved hearing about my journey into Maui Children's Bookstore. This shop is directly across from my workplace (a dance studio) on Maui, so I think a lot of my readers liked seeing a familiar spot on my blog, and there's also a little bit of an awe factor that they're carrying Ivy & Co.! 

Ivy and co, the ivy and co, top blog posts, top 10, 2014 round up, favorite articles, furniture, how to get your product into retail stores, kids memory verses
#6 - After making Boho Head Wraps for quite a while, it was time to do a demo as to How To Tie Your Boho Head Wrap. Yes, that's me modeling.

Ivy and co, the ivy and co, top blog posts, top 10, 2014 round up, favorite articles, furniture, how to get your product into retail stores, kids memory verses
#7 - It's official. 2014 was the year of the black. I painted more pieces black than I can count! This post was a small roundup, and now I have even more to add to the list!

Ivy and co, the ivy and co, top blog posts, top 10, 2014 round up, favorite articles, furniture, how to get your product into retail stores, kids memory verses
#8 - I discovered a new love: doilies. I sew them along a strip of bias tape and make my own bunting. I kind of love it. 

Ivy and co, the ivy and co, top blog posts, top 10, 2014 round up, favorite articles, furniture, how to get your product into retail stores, kids memory verses
#9 - This Black Chalk Paint Vanity brought me to tears, many times over. 

Ivy and co, the ivy and co, top blog posts, top 10, 2014 round up, favorite articles, furniture, how to get your product into retail stores, kids memory verses
#10 - Perhaps one of my favorite posts of the year: Teaching Memory Verses to Pre-Schoolers. This is real life with Ivy, and a special gift that will be written on her heart for years to come. 

So, did your favorite Ivy & Co. post make it on the Top 10?

It's time for me to think about some Ivy & Co. goals for 2015. After all, I told myself at the start of 2014 that I wanted to be in 1 shop by the end of the year… now I'm in 6! 
Happy New Year to you all. Hau'oli Maka Hiki Hou!

Aloha,
Rebecca

Read more ...

Sunday, November 23, 2014

BEFORE & AFTER - Tall Black Dresser

I present to you my first Kauai furniture project. I know, you probably thought the Nautical Side Table came first, but it didn't. I got this tall dresser from a couple one of my first weekends here, and it was in great condition: solid wood, but a little dated. Those knobs... I didn't even get a good "before" picture because I was so eager to get those knobs off. It looked like a pretty standard style dresser, and when it was all finished it looked very "normal," compared to my usual pieces. 

Before and After Tall Black Dresser Re-do Chalk Paint Metallic Paint Martha Stewart

Interesting though - I'm pretty sure this piece was custom made because the original wooden knobs were not a standard size. I could not for the life of me find any knobs to fit, not even online. So I had to buy a standard size and Kit helped me drill new holes and fill in the old holes. 

The inside of the drawers were so clean. The wood was gorgeous.
Before and After Tall Black Dresser Re-do Chalk Paint Metallic Paint Martha StewartBefore and After Tall Black Dresser Re-do Chalk Paint Metallic Paint Martha Stewart

I taped off the edges really well (pat on the back). Honestly I was so impressed with my lines. 

Before and After Tall Black Dresser Re-do Chalk Paint Metallic Paint Martha StewartBefore and After Tall Black Dresser Re-do Chalk Paint Metallic Paint Martha Stewart

Since I can't stop painting things black, (see here, and here, and here and here), this one got a coat of black chalk paint, topped with a metallic sheer brown, called coffee. I think it was a random Martha Stewart paint purchase.
Before and After Tall Black Dresser Re-do Chalk Paint Metallic Paint Martha StewartBefore and After Tall Black Dresser Re-do Chalk Paint Metallic Paint Martha Stewart

Minimal distressing. I like to see a little wood in every piece. Just to remind us of what it's made of.
Before and After Tall Black Dresser Re-do Chalk Paint Metallic Paint Martha Stewart

Before and After Tall Black Dresser Re-do Chalk Paint Metallic Paint Martha Stewart


Before and After Tall Black Dresser Re-do Chalk Paint Metallic Paint Martha StewartA few coats of furniture wax later, and it sold to a lady about to have a baby. 
Before and After Tall Black Dresser Re-do Chalk Paint Metallic Paint Martha Stewart

What color would you have painted it? I've gone black and am having a hard time going back!!

Aloha, Rebecca
Read more ...

Wednesday, September 24, 2014

Before & After: Nautical Side Table

before and after chalk paint black and blue side table with nautical map accents
There's a particular thrift store around here that, well, scares me a little. Let's just say I don't think they're actually in the business of thrifting, and they come up with outrageous prices off the top of their foggy heads. (Am I being mean? Not naming any names!) I finally went in there because I could see some wooden gems in their lot, and thankfully walked away with this cute side table:

before and after chalk paint black and blue side table with nautical map accents

It's most recent stain/varnish/glue (who knows) was warped from the sun, so this was definitely going to have to be on the shabby chic side of the spectrum, which is not my frequent style. After sanding my brains out I realized the rippled varnish was not going to give in, so I whipped out my Long Island Sound maps. (Remember when I got them here?) 

before and after chalk paint black and blue side table with nautical map accents

I got Americana Decor Chalky Finish paint from Home Depot in the color "vintage" and painted the whole outside in that. 
before and after chalk paint black and blue side table with nautical map accents

before and after chalk paint black and blue side table with nautical map accents

Then I did the inside in black chalk paint (drawer inside also). 

before and after chalk paint black and blue side table with nautical map accents

I modge podged the maps on the 3 horizontal surfaces. The bubbling was a little tricky (sorry, no tips on that issue) but I pushed them out as best as I could. I modge podged over the maps, then waxed the whole thing with clear wax. Remember - Measure twice, cut once! I wasted a square of this precious map :(

before and after chalk paint black and blue side table with nautical map accents

before and after chalk paint black and blue side table with nautical map accents

Oh yes, and it got a new knob. Faux crystal. 

before and after chalk paint black and blue side table with nautical map accents

Kit wants it next to his side of the bed, but sorry hubs, it's for sale. 
(Comment or email me if you're interested: ivyandco@icloud.com). 
before and after chalk paint black and blue side table with nautical map accentsbefore and after chalk paint black and blue side table with nautical map accents

before and after chalk paint black and blue side table with nautical map accents

I must say, I'm really enjoying buying, rehabbing and selling from the Garden Isle! 

Aloha, Rebecca
Read more ...

Sunday, August 24, 2014

Tips For Staging Your Photos - A Behind the Scenes Look

tips for staging your blog photos

I've got a secret for you: photos like these don't just happen:
tips for staging your blog photos
How To Recover Vintage Train Cases
Props: rustic chair, notebook, stamp, lip gloss, watch, clothes pins, tin, pens

My life doesn't look like my blog pictures. My photos are staged. 
Don't be surprised. Every good blogger does it. 
tips for staging your blog photos
Yellow Herringbone Chair
Props: rug, planter, driftwood, bunting, stuffed monkey

And honestly, it should be no surprise that my blog contains staging-- I'm a dancer. 
I basically live to get things "stage-ready." 
(Don't be mad, I've also given you plenty of "Reality Show" shots. Click here and here for those.)
tips for staging your blog photos
Picket Fence Baby Soft Block
Props: distressed dresser, gerber daisy, handmade bunny, vine
In my earlier blog posts, some of my pictures are pretty bad. Case in point, look here and here. I was working with a blurry iPhone 3, and was just eager to get my info out there. I've never claimed to be a photographer, and don't really have the desire to get some huge camera and figure out all it's settings. I'm now using my iPhone 5S and fully content. All this to say, I think there are some secrets for amateur photographers to keep in mind to make sure your photos are at least presentable. 


Tips For Staging Your Photos

tips for staging your blog photos
1. Location
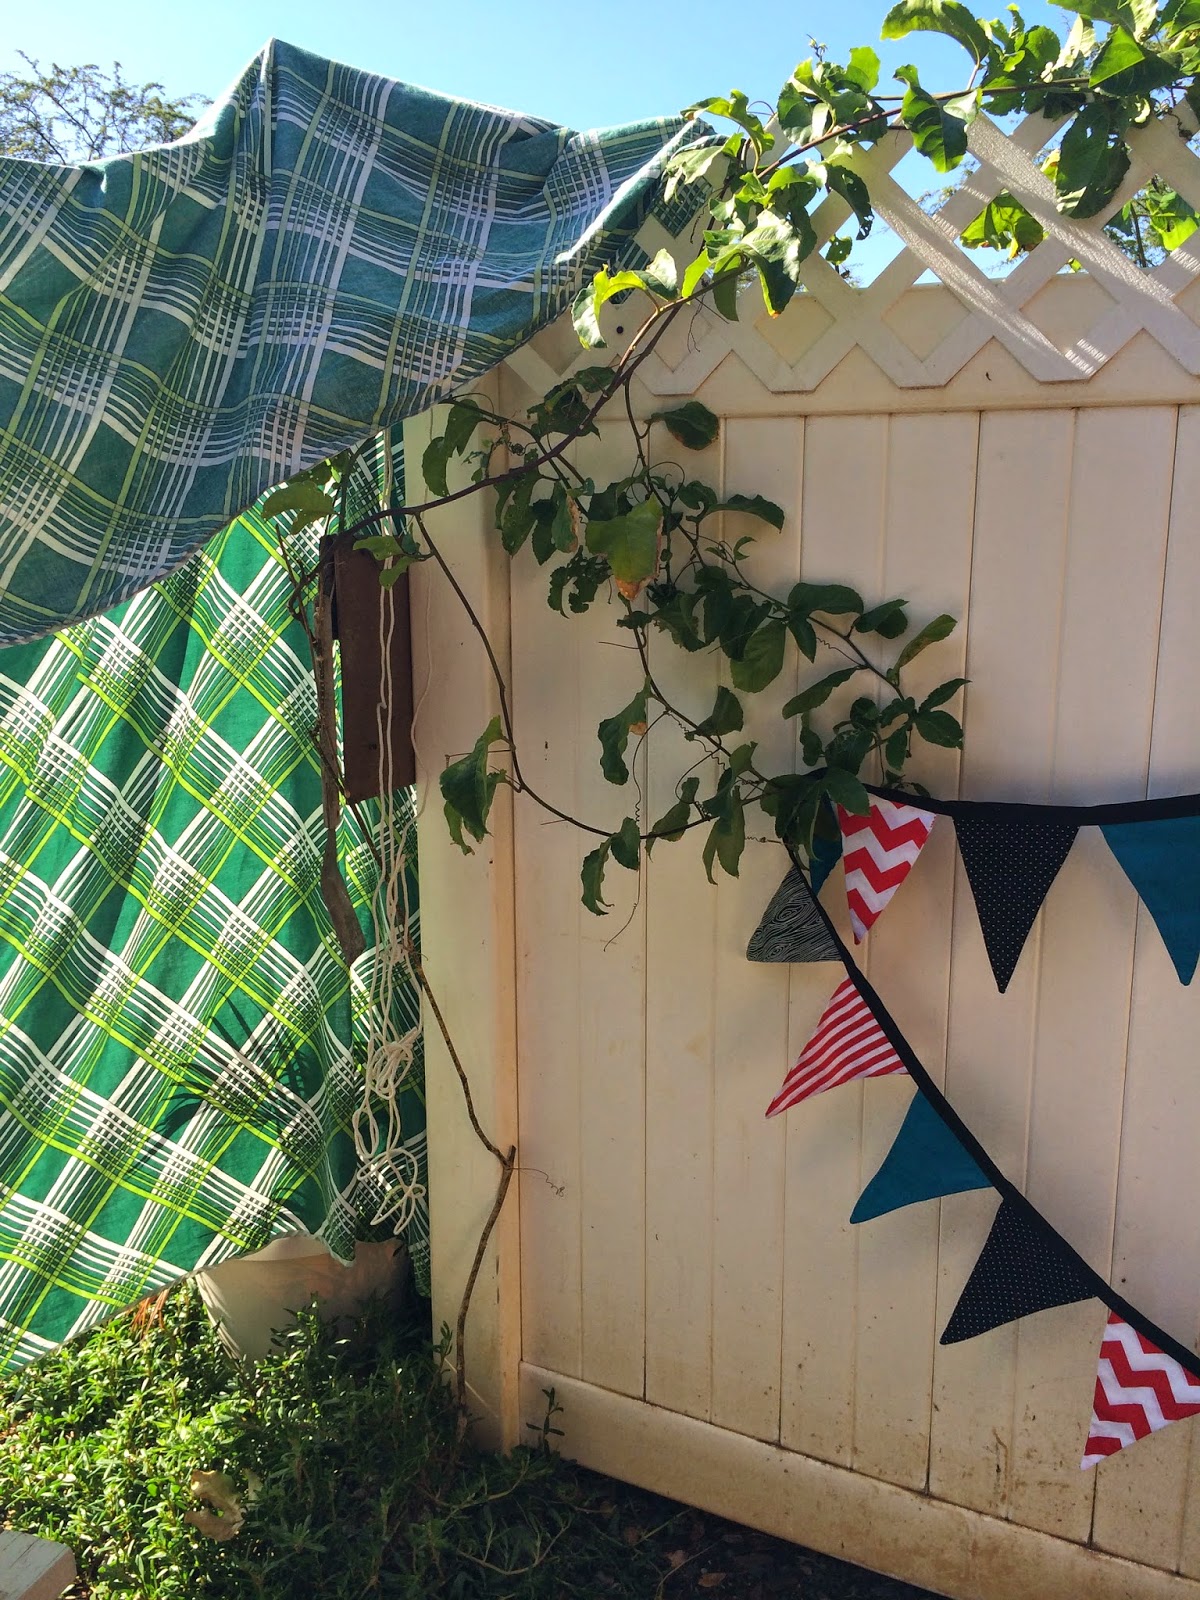
I try to shoot outdoors, before 9am or after 4pm. Sometimes you need to get creative when direct sun and shadows get in the way. (Hence, this ridiculous green sheet hanging up. Direct sunlight was hitting my shot!
tips for staging your blog photos
Look how close the shadow line was, even with the sheet up!!
I literally propped up the sheet with a rope and a BBQ wire brush. I was desperate for the shot!

tips for staging your blog photostips for staging your blog photos


2. Background
The best background is usually white. That's what people are drawn to. I've dabbled in using our wood dining room table for my Etsy Shop products, as well as a green fence over at my parents' house. But in the end, I prefer the white fence that was right outside our Maui house, even if it was a little dirty. (I've yet to find the perfect place here at our new house!) You've probably noticed I like to use this grey rug a lot. Way better than exposing the gravel and weeds it's concealing.

tips for staging your blog photos
Elephant Ear Dresser
Props: driftwood, natural foliage, gerber daisy, handmade bunny, DIY Mason Jar Votive

3. Styling
Style your photos. I like to create 'moments' in all aspects of my work, both onstage, and off.
Here's an example of a moment I created for the stage:
tips for staging your blog photos dance We Bought A Zoo
We Bought A Zoo
Photo by Elizabeth Yee

Props: benches, lighting, gobos, costuming
tips for staging your blog photos
Black-Washed Antique Side Table
Props: rug, doily, creamer cup, vase, natural foliage
In the same way, I want someone to look at a photo on my blog and have the desire to just jump right into it, as if it were a moment they want to be a part of. If it's a chair, they should want to sit in it. If it's an apron, they should want to wear it. The best way to do this is through complimentary everyday props: lamps, rugs, mugs, pens, notebooks, pillows, dolls, vases, driftwood, doilies... the list goes on! When I get ready to shoot a piece of furniture or sewing product, I begin to unload my house's contents.  Everything comes outside so I can quickly grab the right prop. And if you know me, you know I always have cute clothes pins on hand! Be careful not to overload the shot and use too many objects!
tips for staging your blog photos
All this, just to photograph the Dr. Suess bunting!
tips for staging your blog photos
Well, the Elephant Ear Dresser and the Antique Scallop Chair were also photographed that day. :)
photo shoot props tips for staging your photos

4. Editing
Post-photo shoot, I edit in iPhoto. I use it to crop, adjust exposure, shadows, saturation, etc.
Here's an example of the same shot, before and after editing:

tips for staging your blog photos black chalk paint vanity
Before - no photo editing
tips for staging your blog photos black chalk paint vanity
After - with photo editing
Black Chalk Paint Vanity

Props: globe, doilies, lamp, teacup and saucer, vase, mason jar, wooden color block spoons
This was actually a really good day of shooting for this vanity-- great lighting, so the editing was minimal. I know eventually I need to get into photoshop, especially because watermarking your images is essential, and I don't do it nearly enough as I should, but honestly I'm just not ready for that commitment yet, haha. This is a hobby that brings in a little bit of income. I need to be realistic about the time I spend on it. If someone steals my image, I'll cross that bridge when I get there. 

tips for staging your blog photos

5. Clean Up
And then you have to clean it all up! Seriously, clean it up immediately, otherwise your house looks like one of my Reality Show posts, you feel completely unorganized, and your husband gets agro from the mess! 

tips for staging your blog photos

Don't count on your dog to be any help. 
Godiva just likes to sunbathe while Ivy and I do all the work…  
...except in the case of the photo shoot that my pro-photographer friend, Ajja, did with Ivy and I. Godiva was ALL ABOUT participating! I think it was the comfy rugs and pillows. We couldn't get Godiva out of the shots!

tips for staging your blog photos ajja photography
Photo by AJJA Photography
tips for staging your blog photos ajja photography
Photo by AJJA Photography
So, collect your favorite objects (heck, we made a teepee and busted out the ukulele up above!) and start staging your photos! Remember these tips:

tips for staging your blog photos

photo shoot props tips for staging your photos

Happy photographing!
Aloha, Rebecca

Read more ...