Showing posts with label tins. Show all posts

Saturday, February 4, 2012

Master Bedroom - cover those TV cords!

Our home was previously one of my parent's Vacation Rentals here on Maui. So we moved into it totally furnished. I know many of you would love to live in a Maui Vacation home, and my parent's places are really cute, but my style is slightly different. So slowly, we've been making it our own space, as we sift out (some of) the bamboo, tropical flowers and palm tree decor. Shameless plug: if you're looking to vacation in Maui, go 'like' my parents' business page on FB or I can get you their contact info!

But this post is not about style, it's about covering up those awful flat screen TV cords in our Master Bedroom! Previously at the foot of our bed, it looked like this, complete with a 13" TV/VCR combo, 
(and the VCR portion didn't work, haha). And yes, that desk is painted in SHILOH...


For Christmas I really wanted a flat screen mounted at the foot of the bed, centered on the wall, not in a corner (for the sake of my back/neck alignment, haha). So I got a 19" off-brand at Wal-Mart the day after Thanksgiving, for $89! When we mounted it, the TV cords looked horrendous. I don't have a "before" pic, because we wanted them covered up so quick. Since I'm a bunting queen, my husband suggested I do some time of "bunting" to cover it up. He's all, "Make bunting, but not regular bunting... some kind of vertical bunting." Sometimes I'm amazed at our creative collaborations... Here's what came out of it:


I used a single fold bias tape in grey, on top of a satin ribbon. 
Then I chose some favorite fabrics and went to work.


Wasn't totally prepared for the ribbon to curl, like it did, but it's not terrible.
I guess "I mean to do it." :)


This is just decor on the opposite side:


The photo on the top left is one my husband took when we went to Slovenia for my brother's wedding. The collage on the top right are childhood photos of my husband and his older brother.
My brother's wife made the frame/jewelry holder on the left.
In the center is an awesome "photo box" from Pier 1. It opens up with hinges and you place things in and it came with magnets which secure the items in place. I love it. It contains keepsakes also from our Europe trip. 
And, if you've been reading my blog, you know that tin is now covered in fabric which matches the fabric in the top left frame! 


--Becca
Read more ...

Tuesday, January 31, 2012

No-Sew Fabric Covered Tins

I bought these tins for Ivy's first birthday in October 2010 (It was a ladybug theme). We put flowers in them and tied helium balloons to them. Totally fun. 


Well, I re-used them for her 2nd birthday in October 2011 (Elmo theme), and I put these little sesame street 3-D stickers on them, and after the party the stickers wouldn't come off! These adorable tins were starting to get ugly...


See the little Abby/Zoe (whoever it is) on the one on the right? She's still there...


I really wanted to give the tins a second chance. Remember my go-to color "Shiloh"? Well, since it's everywhere in my house anyway, I painted the insides of these tins, and the handles in that color. 

I usually stray away from the term "no-sew." I sew. So why would I want a project where I was trying to fake sewing? Well, for this one, I just felt like sewing was unnecessary for this project. 

I cut out strips of fabric that fit the circumference of the top of the tin.


The second fabric is awesome... It's from Sew Special, my go-to fabric store on Maui. My high school science teacher owns the store and her daughter picks out the BEST fabric. The first fabric (brown foliage) is from Fabric-Mart or something and was dirt cheap. I just thought it was a subtle, non-cheesy neutral. 

 Then I put little cuts on the bottom edge of it, so those cut be wrapped easily on the bottoms.


 Glue gun: on.
Need to find some modge-podge or whatever it's called, but can't seem to find it on this island yet...


After gluing the top of the fabric around the top of the tins, I wrapped the "slitted" edge around the bottom. But it still had an unfinished look. 


So I had fabric from some old sweat pants that were too long for my short legs, and I cut out circles for the bottom of the tin, so it would be nice and soft and easy to slide around.


 Glued on top.


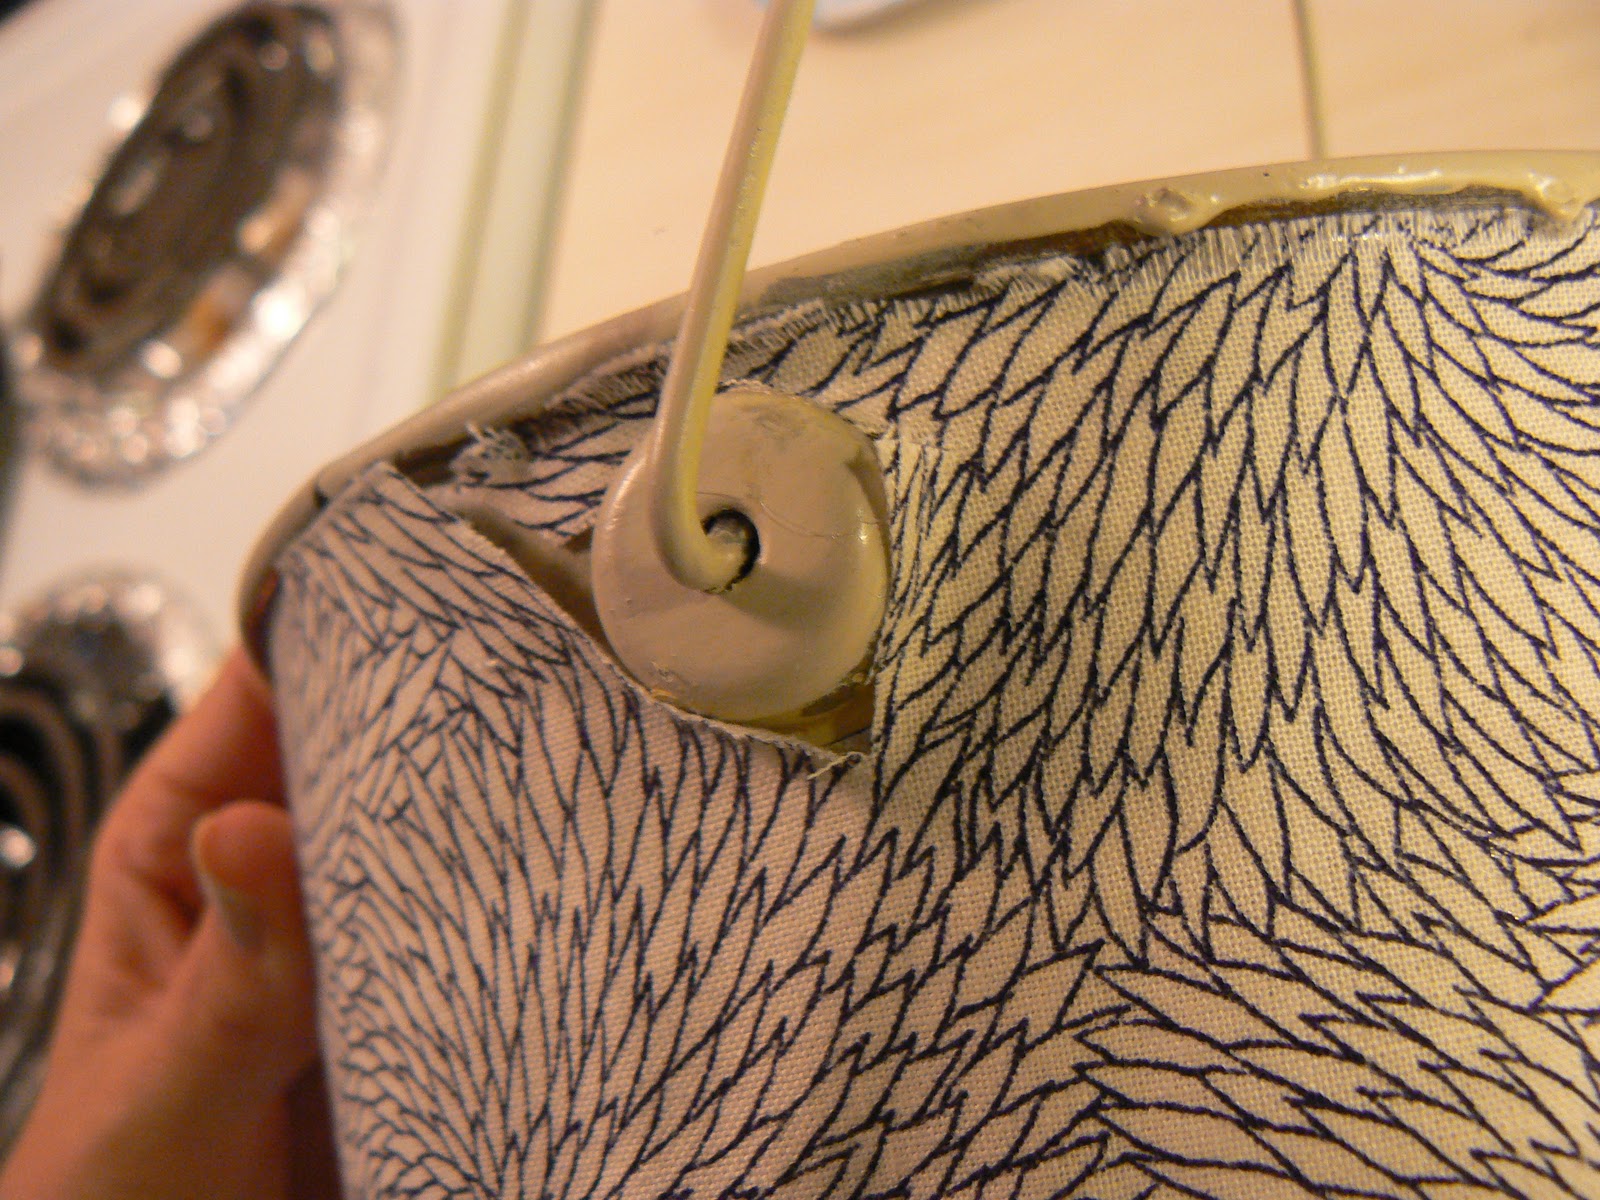
 I'm not gonna lie: the area around the circle/handle part was tricky and not awesome. 


So I took twine and glued it a few times around it to cover up the awkward cuts. I really wanted to use vintage white rick-rack to wrap around it, but it's on loan right now to my friend Ajja. She's an awesome photographer and I made her Photo Booth Backdrop for her website launch party last Saturday, and all of my awesome colored ribbon/rick-rack/lace/etc. is still on the back-drop... 


Two tins complete...


...back in their old homes... 

...catching all the junk next to the couch...


 ...and the pens, hand-sanitizer and body spray on my Shiloh Desk.


One more to make, but I'm not sure which fabric I want to commit to. 

--Becca
Read more ...