Friday, November 2, 2012

Treating Our Windows

If you read my post about our DIY pallet headboard, you know that curtains are becoming an issue in our house, haha. Well, just prior to making the headboard, we got some new window treatments for our dining/living room. Correction: I bought 3 different sets of curtains/panels for our living room, because they were all on sale for just a few more hours, and I didn't want to miss out on the price, but knew I would Kit would want to see options before making a decision. Don't worry, I returned the other two... mostly

So here is what we ended up with: 

They're Bamboo Panels from Pier One. The rods are from Lowes.

These are the curtains I wanted (dead serious). Also, from Pier 1. Kit nixed them immediately. I knew he would. 
Here's a secret: I only returned 3 of the 4 panels I bought of this orange goodness. I kept one panel for myself... just cause. 

I know the ones we settled on look great, are very adult, and will go with most decor. More importantly, they slide easily and keep the right amount of light in and out of the house. 

Here's the curtains we had prior (on the right of the photo). I thought they were super cute, but we couldn't slide them open or closed. Most of the time they ended up thrown over the rod. Pardon the crazy photo of Ivy in my character shoes. I couldn't find any other photo of the curtains!

We chose to mount the curtains higher than the window (as is the decor trend right now) because they make the windows/room look bigger. We're super happy with this purchase. This is one project where my husband said, "You should probably blog about this." I love him.


Aloha, 
Rebecca

Read more ...

Thursday, November 1, 2012

ALOHA Friday Link Party #11


Aloha Kakahiaka! (Good Morning)

Welcome to Jed & Ivy's ALOHA Friday Link Party #11!
Halloween and the Tsunami Evacuation pretty much wore me out... what about you?
Hana Hou! (that means, "let's see it again")

A Harp Chair Redo from Home Sweet Home. 
I chose this project, because
#1- I think it turned out great, and
#2 - I'd really like to do a chair redo that includes a fabric seat. I haven't gotten my hands on the right piece and I'm envious of this chair. :)


Go ahead and grab the featured button below!

Jed & Ivy
Pau Hana! 
(That means we're finished working for the week...)

Jed & Ivy
Link up your DIY projects, Etsy products, giveaways, Furniture re-do's (my fave), sewing tutorials, inspiring stories. I'm not picky!
Grab the button and post it on your blog, if you have one. 
Follow this blog.
By linking up, you're allowing me to feature your photos on this blog and pinning them. 
Share the Aloha and visit each other's links! 

Aloha,
Rebecca


Read more ...

Monday, October 29, 2012

DIY Starfish Costume

Somehow Ivy got it in her head that she was going to be a Starfish for Halloween. I have no idea how she came up with this. Why couldn't she be a Super Hero? (I made a cape for her already, see post here). Or Rapunzel? Or Cinderella? We have those costumes... (see post here). But no, a Starfish. I have to admit, I thought it was a great idea, (super creative) but I didn't want to get it wrong, because I knew my decisive child had some type of vision of what her costume would look like. After a little prying and convincing, we decided it would be a Starfish Princess costume. (That was my vision, and what I knew I could pull off). I went to Sew Special and Ben Franklin and got some fabric and accessories. Ivy had a hacking cough, so we couldn't go to church the next day, so I had a whole Sunday to put this together.
DIY Starfish Costume girl smiling beach
Supplies:
-white leotard (Ivy had a white leotard already)
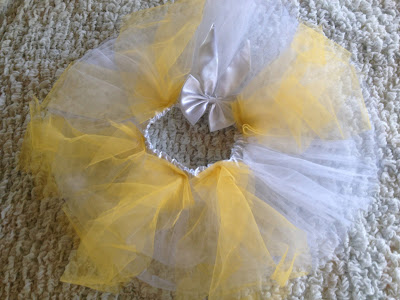
-white tutu (I got one from Icing for $6.25)
-1/2 yard of orange seashell fabric ($2)
-1/2 yard of white star fabric ($2)
-1 yard of green star fabric (had this)
-faux fishing net ($6.99)
-starfish ($4.99)
-yellow mesh netting (had this)
-orange bias tape (had this)
-green leaf ribbon ($2.99)
-glittery gold Christmas leaf decor ($4.99)
-headband ($1.50)
-small piece of felt
-sewing machine
-scissors
-glue gun
-thread
DIY Starfish Costume ben franklin suppliestutu leotard DIY Starfish Costume


DIY Starfish Costume star cut-out1. I cut out 4 large stars for the skirt, and 4 smaller stars for the bodice. (Green was the underneath color. I just layer the fabric over the tutu and made it a little wider than the tutu. Same for the leotard. I wanted it to slightly wrap around the tutu.) 

DIY Starfish Costume skirt2. I sewed the stars together right side in, (orange w/green, white w/green) but left a little seam open so I could flip it right side out.  

3. After flipping it right side out, I re-sewed the edges so that they would lay flat.

4. I layer the stars over the tutu, and sketched a hole over the waist band, then cut out a circle. This was a very ghetto way of doing this. I tacked net and "seaweed" (the green leaf ribbon) to the orange star and glue gunned starfish to the edge of the orange star. Then I sewed orange bias tape around the waist. I wish I thought through this part a little better. Luckily Ivy is a skinny-mini and can just slip this on over her non-existent booty, but in all honesty, I needed to put some type of elastic waistband here. Oh well... 

DIY Starfish Costume skirtDIY Starfish Costume skirt
DIY Starfish Costume leotardDIY Starfish Costume skirt leotard

DIY Starfish Costume skirt5. I tacked a few piece of the yellow mesh netting onto the tutu, to give it some "life & depth" under the starfish.
6. Since all the Christmas decor was out at Ben Franklin, I picked up this gold Christmas leaf decor thing. I think you're supposed to put them in a vase? (I'm not really all about putting fake plants in vases.) I made sure to choose one that looked like seaweed. I cut off some pieces and sewed them under the orange stars on both the bodice and the skirt portion, so they would "peek out" from under.
   
7. I got a yellow headband from Icing for $1.50 on clearance. I cut a circle out of white felt and glue gunned the mesh, the leaf ribbon, the gold Christmas seaweed and a starfish onto the felt. When it dried, I glue gunned the felt to the yellow headband.

DIY Starfish Costume girl on beachDIY Starfish Costume headband


Of course, as is the case in every Ivy/Becca project, it results in an informal photo shoot. No children were harmed in this shoot. All pure fun! For this particular shoot, I chose the beach in front of my late grandma's condo, where she lived for at least 15+ years before she passed away last year. It's 2 blocks from my house, and I hadn't been to the condo or the beach since July 20, 2011, (the day before it sold.) My, Ivy and my dad (it was his birthday) had gone there for one last swim in the pool. My grandma taught kids to swim for much of her life, and being the fact that Ivy just finished her first round of swimming lessons, I'm a little sentimental and wish my grandma were here to teach her. My grandma also had lived on a boat in Florida and had such a love for the ocean. She definitely passed that on to her family. Maybe that's why Ivy chose to be a starfish?!
DIY Starfish Costume girl on beach

DIY Starfish Costume girl on beachDIY Starfish Costume girl on beachDIY Starfish Costume girl on beachDIY Starfish Costume

DIY Starfish Costume Hawaii


DIY Starfish Costume with mermaidDIY Starfish Costume with mermaid hawaii


 So for $31.71 plus tax, this is a custom-made Starfish Princess Costume! Not bad. And to think I almost gave in and picked up a Wal-mart costume for $19.99...

Be safe this Halloween!
Aloha,
Rebecca

DIY Starfish Costume girl on beach

Read more ...

Sunday, October 28, 2012

Tsunami warning. We are all ok!

Yes, there was a tsunami warning here in Hawaii last night. First wave was supposed to hit at 10:28pm. We live a block from the beach so I had to leave my work Halloween Party to go home and evacuate. (ivy was a starfish and I was a toddler from toddlers and tiaras).

When I got home, I put a photo album up off the floor and packed a change of clothes. Kit put our dog Godiva in the back of his truck and locked all the windows and doors and we headed to Safeway parking lot to "camp" in the car. Ivy was soooooo excited. Grandma, grandpa, aunty Kim and cousins Colin and Aiden were there. After a meet and greet with the family ivy and I put down the back seat of my suv, got out the sleeping bag, and went to sleep. At around midnight, when the waves weren't hitting as expected, my husband said we were heading home. They actually didn't give an all clear until 4am... But considering the same thing pretty much happened in the Japan Quake tsunami in March 2011, I felt fine going home.

Bummed we had to leave the party but glad we are all ok!
Read more ...

Friday, October 26, 2012

ALOHA Friday Party #10


Aloha Kakahiaka! (Good Morning)

Welcome to Jed & Ivy's ALOHA Friday Link Party #10!

Hana Hou! (that means, "let's see it again)

Feature # 1: Doily Rings from Yellow Spool
Aren't these adorable? 


She got the materials from a rubbish dump!

Go ahead and grab the featured button below!

Jed & Ivy
Pau Hana! 
(That means we're finished working for the week...)
Grab a lilikoi, link up, and leisurely look through the other fun posts!

Jed & Ivy
Link up your DIY projects, Etsy products, giveaways, Furniture re-do's (my fave), sewing tutorials, inspiring stories. I'm not picky!
Grab the button and post it on your blog, if you have one. 
Follow this blog.
By linking up, you're allowing me to feature your photos on this blog and pinning them. 
Share the Aloha and visit each other's links! 

Aloha,
Rebecca


Read more ...

Monday, October 22, 2012

DIY Pallet Headboard

When we moved our bedroom furniture around, we removed the rattan headboard my parents had in there from when our house was a vacation rental. When Ivy started sleeping through the night, we put the blackout curtains from her room into our room so we could sleep better! They're plain grey and simple. NOTHING special about them, except function. They hang above our heads while we're sleeping, and I've noticed they rest on my face during the night. This has really begun to irritate me in the past month or so. There are a million ways to remedy this, I know... I've hashed through them all... The other day I asked Kit (kind of jokingly) if he would make a pallet headboard for us so that the curtains would fall behind it, not on my face. 
The next day I heard a saw and drill going outside, and I found this taking place:

My husband was making a headboard for us! When I got home from work that night, I found this:

He gave it a coat of Antique White. The next morning I sanded it down and it became really smooth. I think it was a good idea to paint before sanding, because of how rough pallets are.

I didn't want to spend any money on this, and I kind of envisioned it being a bunch of different colors. In pencil I lightly wrote the initial of which color would go on which pallet: 

Here's what transpired:

And here it is mounted to the wall above our bed!


At night, when the curtains are closed, it sits on top of the pallet, rather than resting on our faces. 


 It has the same color in it from that mirror on the left, Shiloh. Click here to see that post.


To be honest, I'm not in love with all of the colors on the headboard. It's a little too "beach boutique" for me. (According to the Homegoods Stylescope quiz I took yesterday, my decor style is Urban Funk with a touch of Boho. Click here to take the quiz) The oops yellow and the Hollingsworth Green (colors on the top right) jump out too much for me. I almost want them to be an olive or burnt orange/brown or something. They look pretty good with this bedding set, (Urban Outfitters), and they'll look great with our white Ikea set, but my new electric blue Ikea set doesn't look too hot with it. But that's the beauty of paint! I can change it up whenever I like!

So that's our take on the oh-so-popular pallet headboard. Do you have one yet?


Thanks, Kit, for making it for us!! I love sleeping without curtains in my face!

Aloha, Rebecca


Read more ...