
I bought these tins for Ivy's first birthday in October 2010 (It was a ladybug theme). We put flowers in them and tied helium balloons to them. Totally fun.

Well, I re-used them for her 2nd birthday in October 2011 (Elmo theme), and I put these little sesame street 3-D stickers on them, and after the party the stickers wouldn't come off! These adorable tins were starting to get ugly...


See the little Abby/Zoe (whoever it is) on the one on the right? She's still there...
I really wanted to give the tins a second chance. Remember my go-to color "Shiloh"? Well, since it's everywhere in my house anyway, I painted the insides of these tins, and the handles in that color.
I usually stray away from the term "no-sew." I sew. So why would I want a project where I was trying to fake sewing? Well, for this one, I just felt like sewing was unnecessary for this project.
I cut out strips of fabric that fit the circumference of the top of the tin.


The second fabric is awesome... It's from Sew Special, my go-to fabric store on Maui. My high school science teacher owns the store and her daughter picks out the BEST fabric. The first fabric (brown foliage) is from Fabric-Mart or something and was dirt cheap. I just thought it was a subtle, non-cheesy neutral.
Then I put little cuts on the bottom edge of it, so those cut be wrapped easily on the bottoms.

Glue gun: on.
Need to find some modge-podge or whatever it's called, but can't seem to find it on this island yet...

After gluing the top of the fabric around the top of the tins, I wrapped the "slitted" edge around the bottom. But it still had an unfinished look.


So I had fabric from some old sweat pants that were too long for my short legs, and I cut out circles for the bottom of the tin, so it would be nice and soft and easy to slide around.

Glued on top.

I'm not gonna lie: the area around the circle/handle part was tricky and not awesome.
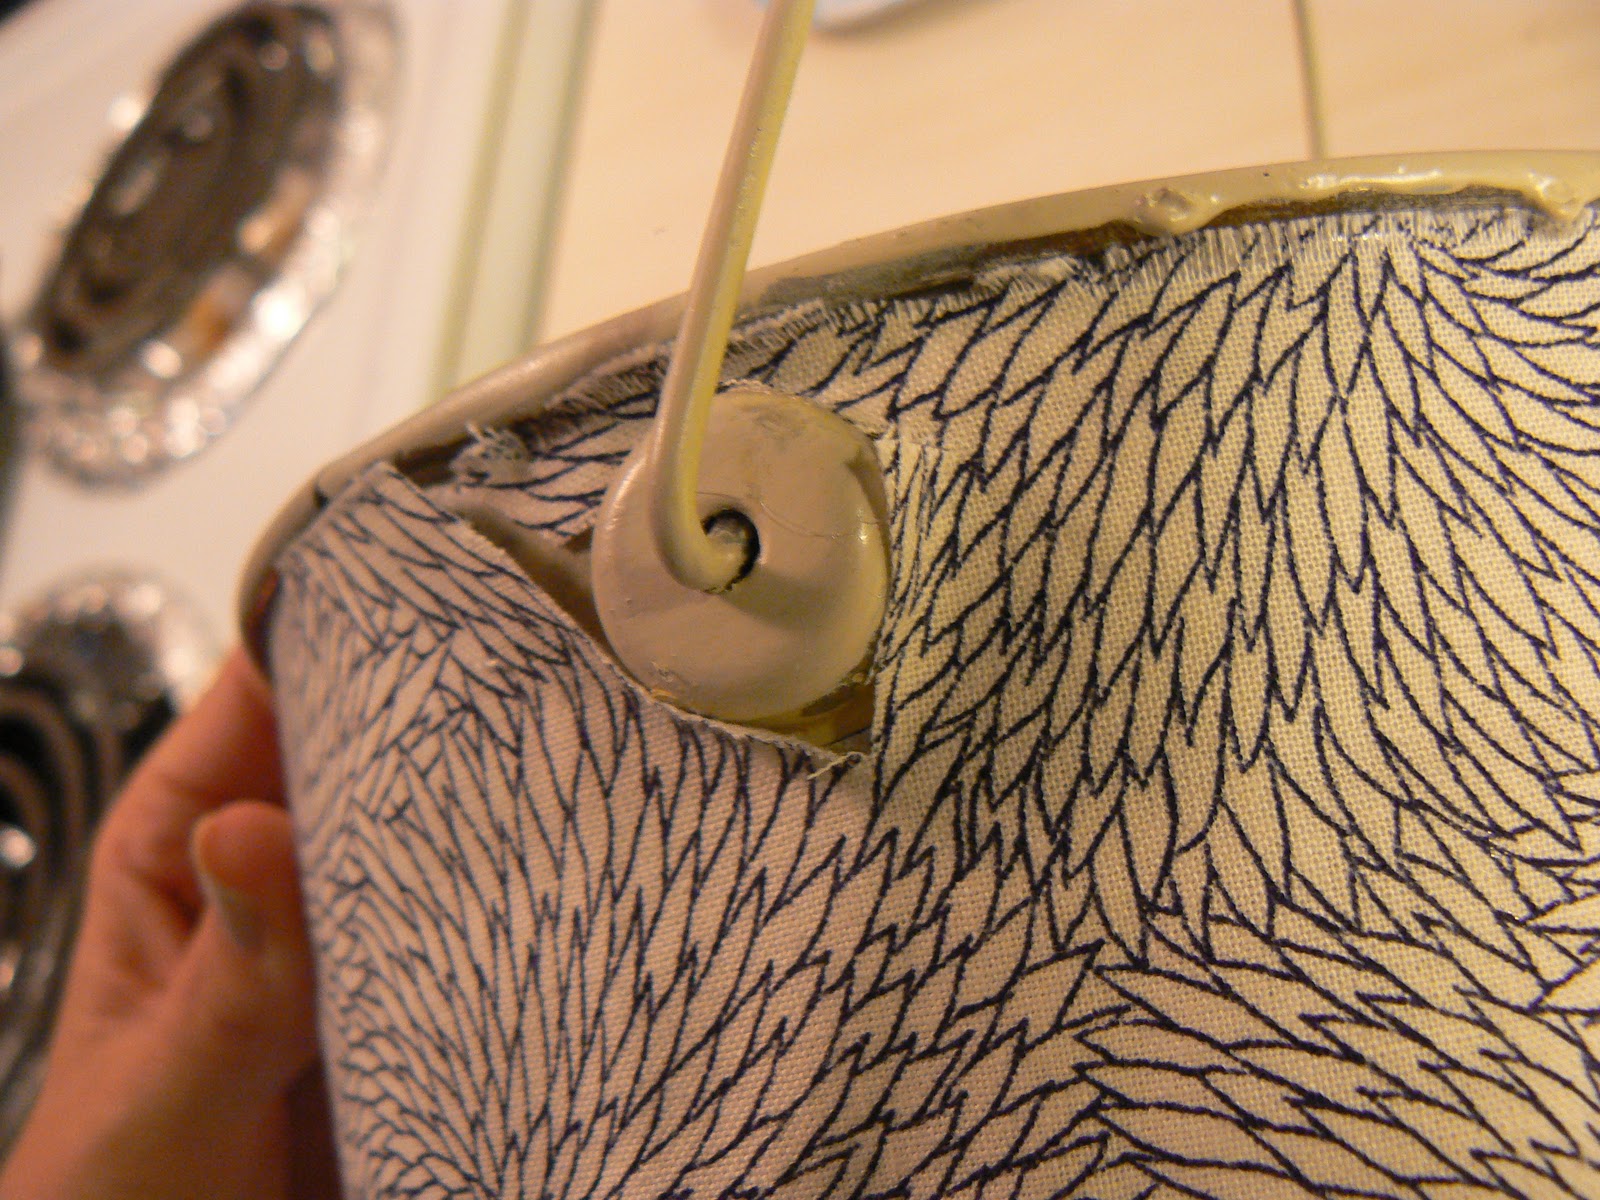
So I took twine and glued it a few times around it to cover up the awkward cuts. I really wanted to use vintage white rick-rack to wrap around it, but it's on loan right now to my friend Ajja. She's an awesome photographer and I made her Photo Booth Backdrop for her website launch party last Saturday, and all of my awesome colored ribbon/rick-rack/lace/etc. is still on the back-drop...

Two tins complete...

...back in their old homes...
...catching all the junk next to the couch...


...and the pens, hand-sanitizer and body spray on my Shiloh Desk.

One more to make, but I'm not sure which fabric I want to commit to.
--Becca
Homemade modge podge --- http://babblingsandmore.blogspot.com/2011/10/homemade-mod-podge.html
ReplyDeleteThese look great! Love you!
Hi there! I just wanted you to know that you are the winner of my UrbanWalls giveaway! I couldn't find you email address anywhere on your blog - so if you could contact me with it, I can get it to Danielle at UrbanWalls.
ReplyDeleteThanks! Ashlyn
pineconeplace@gmail.com
Thanks for the link Anna. And thanks for getting in touch with me Ashlyn! So excited!
ReplyDeleteI seriously love this idea! so excited you are blogging! I am going to take stab at bunting and I will let you know how it goes!
ReplyDeleteI love that you are finding new ways to use what you already have - so thrifty!
ReplyDelete